Soaps
at
Hickory Springs Farm
I've been making soaps for several years now, I'm thoroughly addicted. Below is my first experience making soap. Not much has changed, other than I now buy most of my supplies in bulk.
My Very First Attempt At Making Soap!!!
PLEASE do not try to make soap based on my pictures and descriptions alone! Get a book, read up on what to do, and how to do it, and be careful! It is much easier then I ever thought, but not something you should be trying based on this quick synopsis of my experience! Keep in mind, I am complete new to this - this is my first attempt at soap!
|
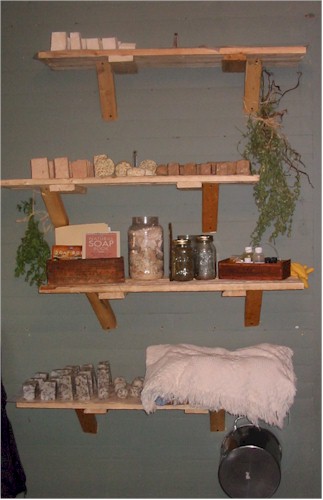
Since my first attempt I have made a lot of soap... I enjoy it tremendously! These are the shelves my husband built for me in the laundry room - they are made out of boards from free skids - the cross boards were the perfect size for me, and kept the rustic look I love. (We have a new house now, but I do not yet have new shelves. I loved these!) My favorite Soap Making List:
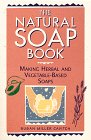
The recipe I used is from:
(click on the book to buy it at amazon.com) I can not recommend this book strongly enough - it is a delightful read even if you never make soap! Simple, uncomplicated, basic how to with recipes book. I must also thank Robin, of Thyme For Ewe Farm... Robin got me interested in, and answered 10,000 questions as I took on this new hobby! Thanks Robin! :-) To read Robin's basic soap instructions, go here.
Another book that I have been enjoying is:
(click on the book to see it at amazon.com) This one is a lot more in depth, and not nearly as easy to get started with... I would definitely recommend starting with the first book and adding this one to your collection to browse after you make your first batch.
Prices for coconut oil: Coconut oil seems to be the hardest item to locate - and the most expensive. I found some at our local healthfood store - but they are tiny containers and very high priced. No one else around here can even order it for me - although it is certainly worth it to call around - try restaurant supply stores, movie theaters, and health food stores. I resorted to buying online - and I am very happy with the service and prices available! It is cheapest to buy my essential oils online too! A few of the websites where I found the best prices are:
Purchasing Lye I found lye in our local grocery store, in the cleaners aisle, by the drain cleaners - that is what it is primarily used for here. You can also find it at hardware supplies stores. Our wal-marts do not carry it. Again, I found the best prices online. I've been told that many farm supply stores carry it, but our local ones do not.
|
Getting Started It took me forever to build up the nerve to try this... I read tons of websites, articles, and the Soap Book by Sandy Maine I think I have memorized now. :-) I had to look for the supplies too - I have not yet found a local soap making supply store, coconut oil especially was hard to track down. The expense to get started was a lot higher then I anticipated - first the scales, then the oils, the thermometer, gloves, lye... all together were a bit costly. Well worth it though! Approximate costs for me: Scales - $31 with shipping, on ebay Stick blender - $9 wal-mart Thermometer - $3 at wal-mart Lye - $3.50 at grocery store Olive Oil - $2 at grocery store Crisco - $3 at grocery store Coconut Oil - $7 at health food store I bought a Rubbermaid container for a second mold - my mom gave me an old wooden one that I like best though!
Finally, with everything assembled, and Dan home to keep and eye on the kids, I made soap!!
It was a nice fall day, so I set the lye up on the side porch table -I didn't mix it, just set the proper amounts out and ready. Next I mixed my oils...
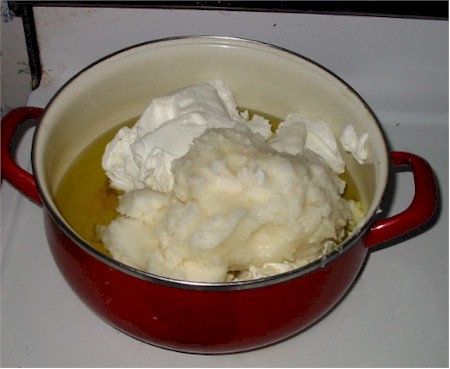
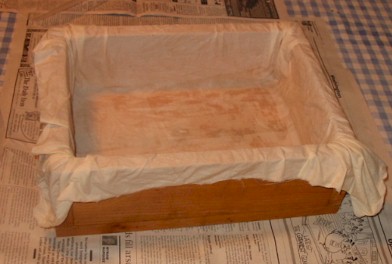
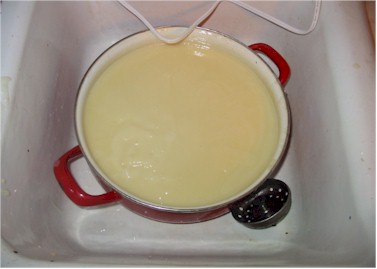
In this pan I have the olive oil, which I should not have - I took it back out and melted down the Crisco and coconut oils, THEN added the olive oil. I didn't turn the stove on yet - instead measured out the oatmeal, ran it through the blender, and made sure my thermometer and stick blender where ready to go, and my mold was ready. I soaked a piece of muslin in water, rung it out, and lined my wooden box with it.
With everything ready, I went out and mixed the lye and water. I used a gallon jar, the fumes were much less then I expected! But I was outside too. The water turned cloudy white, and got VERY hot - much hotter then I was expecting! I left the lye to cool, and started melting the oils... once they were melted, and olive oil added, I worked on getting both the oil and the lye to the right range of temperature - this part took me the longest. Once they were the righ temp, I mixed the lye into the oils, slowly, while stirring. Then I used my stick blender to mix until it was "trace" - this went much faster then I expected!!
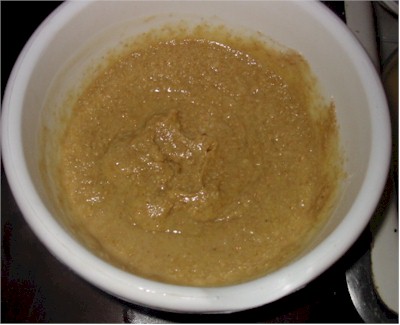
I took a little of this mixture, dumped it into a bowl with he blenderized oatmeal, and mixed it together.
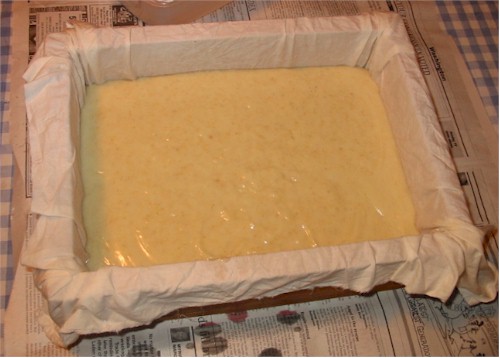
then I mixed the oatmeal mixture into the rest of the soap, and mixed it thoroughly, before pouring into my mold.
I covered it with a sheet of wax paper, then layered with blankets, for the required 24 hours.
|
Here is the soap, 2 and a half hours after being poured into the mold:

I cut it into bars after 24 hours (picture at the top of the page) , and let it cure two weeks. I love the soap! It is more abrasive then I had expected, but a great soap!